Gardening in Milk Crates: A Space Saving Approach
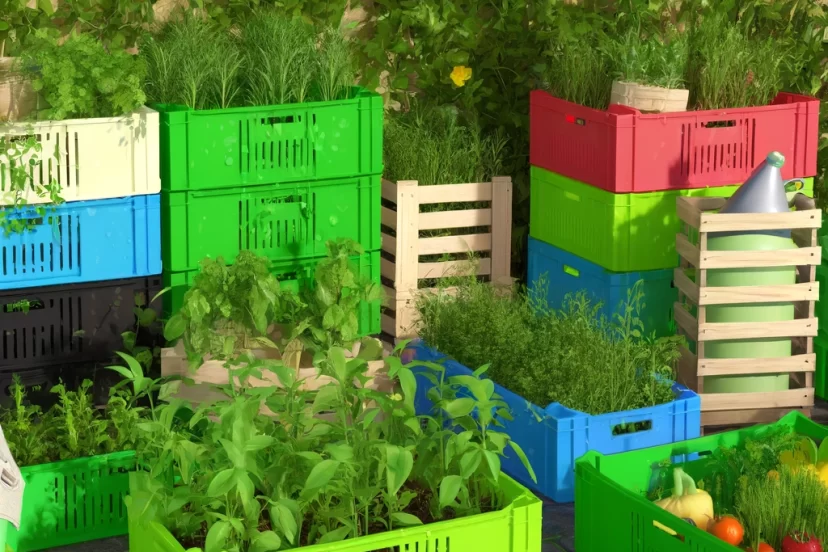
Introduction to Gardening in Milk Crates
Gardening in milk crates is a creative and practical way to grow plants, especially when space is limited. This method of gardening transforms ordinary milk crates into portable, versatile, and cost-effective planters. Whether you have a small balcony, a tiny backyard, or just a sunny spot in your home, milk crate gardening can work for you. In this guide, we’ll explore the benefits of gardening in milk crates, how to get started, and tips for maintaining a thriving garden.
Benefits of Gardening in Milk Crates
Space-saving
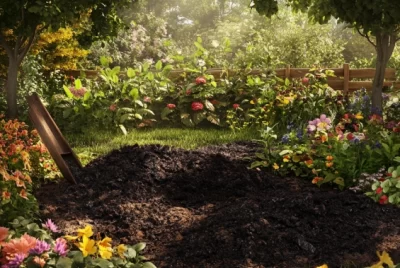
One of the biggest benefits of gardening in milk crates is that it saves space. Milk crates are compact and can fit into small areas where traditional gardens might not be possible. You can stack them, arrange them in rows, or even hang them to maximize your growing space.
Cost-effective
Gardening can get expensive, but using milk crates is a budget-friendly option. Often, you can find milk crates for free or at a low cost. Plus, they are durable and can be reused year after year, making them a great long-term investment for your gardening needs.
Portability
Milk crates are easy to move, so you can rearrange your garden as needed. If you’re renting or planning to move, you can take your garden with you. This flexibility is perfect for gardeners who want to experiment with different plant placements or need to protect their plants from changing weather conditions.
Versatility
Milk crates are versatile and can be used to grow a variety of plants, from vegetables and herbs to flowers. You can customize your garden to suit your preferences and needs, making it a fun and rewarding project.
Getting Started Gardening in Milk Crates
Choosing the Right Milk Crates
To start your milk crate garden, the first step is to choose the right crates. Here’s what you need to consider:
Types of Milk Crates
There are different types of milk crates available, including plastic and wooden ones. Plastic crates are lightweight, durable, and resistant to weather conditions. Wooden crates can add a rustic charm to your garden but might need additional treatment to prevent rot and decay.
Size and Durability
Choose crates that are sturdy and large enough to hold soil and plants. Standard milk crates are usually about 12 inches on each side, providing enough space for the roots to grow. Make sure the crates are in good condition without any cracks or breaks.
Preparing the Crates
Once you have your milk crates, it’s time to prepare them for planting.
Cleaning and Sanitizing
Before using the crates, clean them thoroughly to remove any dirt, dust, or residues. You can use soapy water and a brush to scrub them clean. Sanitizing the crates with a mild bleach solution (one part bleach to nine parts water) can help kill any bacteria or fungi that might harm your plants. Rinse the crates well and let them dry completely.
Adding Drainage
Good drainage is crucial for healthy plant growth. Most milk crates have holes on the sides and bottom, but you may need to add more or line the crate with a landscape fabric to keep the soil in while allowing excess water to drain out. This helps prevent waterlogging and root rot.
Gardening in Milk Crates: Selecting the Right Plants
Choosing the right plants for your milk crate garden is essential for success. Here are some options to consider:
Best Vegetables for Milk Crate Gardens
Vegetables like lettuce, spinach, radishes, and carrots grow well in milk crates. These plants don’t need a lot of space for their roots and can thrive in the confined space of a crate.
Ideal Herbs for Milk Crate Gardens
Herbs such as basil, parsley, mint, and cilantro are perfect for crate gardening. They are easy to grow and can provide fresh flavors for your kitchen all season long.
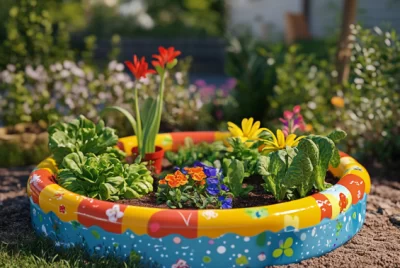
Flower Options
Flowers can add color and beauty to your garden. Marigolds, petunias, and pansies are great choices that can thrive in milk crates. They are also beneficial as they attract pollinators and can deter pests from your vegetables and herbs.
Gardening in Milk Crates: Setting Up the Garden
Positioning Your Milk Crates
Where you place your milk crates is crucial for the health of your plants.
Indoor vs. Outdoor Placement
Milk crate gardens can be placed both indoors and outdoors. For indoor gardens, make sure the crates are near a window where they can get plenty of sunlight. Outdoor gardens should be placed in areas that receive at least 6-8 hours of sunlight daily.
Optimizing Sunlight Exposure
If your garden area doesn’t get consistent sunlight, consider using plant grow lights to supplement natural light. Rotating your crates every few days can also help ensure that all plants get even exposure to sunlight.
Soil and Fertilization
Choosing the right soil and fertilizers is key to a healthy garden.
Choosing the Right Soil Mix
A good soil mix should be well-draining and rich in organic matter. You can use a commercial potting mix or create your own by combining garden soil, compost, and perlite or sand for better drainage.
Adding Organic Matter and Fertilizers
Incorporate organic matter like compost or well-rotted manure into your soil mix to provide essential nutrients. Regular feeding with a balanced, slow-release fertilizer can also help keep your plants healthy and productive.
Gardening in Milk Crates: Planting and Maintenance
Planting Techniques
Getting the planting process right is crucial for a thriving milk crate garden.
Seed Starting
Starting plants from seeds can be rewarding and cost-effective. To begin, fill your milk crate with your prepared soil mix, leaving about an inch from the top. Create small holes according to the seed packet instructions, usually about 1/4 to 1/2 inch deep. Place one or two seeds in each hole, cover them lightly with soil, and water gently. Keep the soil moist but not waterlogged until the seeds germinate.
Transplanting Seedlings
If you prefer a quicker start, you can buy seedlings from a nursery and transplant them into your milk crates. Carefully remove the seedlings from their containers, being gentle with the roots. Dig a hole in the soil mix that’s slightly larger than the root ball of the seedling. Place the seedling in the hole, fill in around it with soil, and press down gently to eliminate air pockets. Water thoroughly after planting.
Watering Strategies
Proper watering is essential for healthy plants in milk crates.
Frequency and Methods
The frequency of watering will depend on the weather, the type of plants, and the soil mix. Generally, you should water when the top inch of soil feels dry to the touch. In hotter climates, you might need to water daily, while in cooler climates, every few days may suffice. Use a watering can with a fine spout or a hose with a gentle spray to avoid displacing the soil.
Avoiding Overwatering
Overwatering can lead to root rot and other problems. Ensure that your milk crates have adequate drainage to allow excess water to escape. To prevent overwatering, check the soil moisture regularly and adjust your watering schedule as needed.
Pest and Disease Management
Keeping pests and diseases at bay is crucial for a healthy garden.
Common Pests and Solutions
Milk crate gardens can be susceptible to common garden pests such as aphids, slugs, and caterpillars. To manage these pests, you can use natural solutions like neem oil or insecticidal soap. For slugs, placing crushed eggshells or diatomaceous earth around the base of the plants can deter them. Regularly inspect your plants for signs of pests and take action promptly.
Disease Prevention
To prevent diseases, ensure good air circulation around your plants by not overcrowding them. Watering at the base of the plants rather than overhead can help prevent fungal diseases. Remove any dead or diseased plant material promptly to prevent the spread of infections. Crop rotation and using disease-resistant plant varieties can also help reduce the risk of plant diseases.
Gardening in Milk Crates: Seasonal Considerations
Gardening in milk crates can be adapted to different seasons.
Spring and Summer Gardening
Spring and summer are ideal times for growing a wide variety of plants in your milk crate garden. Warm-season vegetables like tomatoes, peppers, and cucumbers thrive during these months. Ensure your plants receive plenty of sunlight and water regularly to cope with the heat. Consider using mulch to retain soil moisture and reduce weeds.
Fall and Winter Gardening
With the right approach, you can extend your gardening season into fall and winter. Cool-season crops like kale, spinach, and broccoli can be grown in milk crates during these times. In colder climates, you might need to bring your crates indoors or use row covers and cold frames to protect your plants from frost. Choosing hardy plant varieties and providing adequate protection can help your garden thrive even in cooler months.
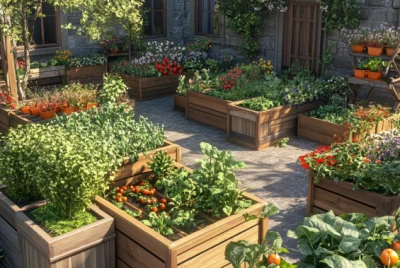
Creative Ideas for Gardening in Milk Crates
Vertical Gardening
Milk crates are perfect for vertical gardening, which maximizes space and creates a striking visual effect. You can stack crates on top of each other, securing them with zip ties or bungee cords to create a vertical garden. Plant trailing plants like strawberries or vines in the top crates and bushier plants in the lower ones.
Stacking and Tiered Arrangements
Another creative idea is to arrange milk crates in a tiered fashion. Place crates at different heights using bricks or wooden blocks to create a multi-level garden. This arrangement not only looks attractive but also allows for better light distribution and easier access to your plants.
Decorative and Functional Designs
Incorporate decorative elements into your milk crate garden to make it both functional and aesthetically pleasing. Paint the crates in bright colors to add a pop of color to your space. You can also use stencils to create patterns or label the crates with the names of the plants. Adding accessories like trellises, garden gnomes, or fairy lights can make your garden a delightful place to spend time.
Troubleshooting Common Gardening in Milk Crates Problems
Poor Plant Growth
If your plants are not growing well, there could be several reasons. Check if they are getting enough sunlight and water. Ensure the soil has the necessary nutrients and consider adding compost or fertilizer if needed. Sometimes, poor growth can be due to pests or diseases, so inspect your plants regularly.
Soil and Nutrient Issues
Soil quality is vital for plant health. If your plants seem unhealthy, the soil might be lacking in essential nutrients. Conduct a soil test to determine the pH and nutrient levels. Adding organic matter, such as compost or well-rotted manure, can improve soil fertility. Using a balanced, slow-release fertilizer can also help provide the necessary nutrients for healthy plant growth.
Gardening in Milk Crates Conclusion
Gardening in milk crates is an innovative and versatile way to grow your own plants, whether you have ample outdoor space or just a small indoor area. By using milk crates, you can save space, reduce costs, and enjoy the flexibility of a portable garden. From choosing the right crates and preparing them properly to selecting the best plants and maintaining them through various seasons, this method offers a fun and practical solution for gardeners of all levels.
To recap, we started with the benefits of gardening in milk crates, highlighting their space-saving, cost-effective, portable, and versatile nature. We then discussed how to get started by choosing the right crates and preparing them for planting. Selecting the right plants, including vegetables, herbs, and flowers, was also covered. We moved on to the specifics of planting and maintaining your garden, emphasizing the importance of proper watering, pest and disease management, and seasonal considerations. Creative ideas like vertical gardening and tiered arrangements can add both functionality and aesthetic appeal to your garden.
By troubleshooting common problems such as poor plant growth and soil nutrient issues, we provided practical solutions to help ensure your garden thrives. With these tips and techniques, you can create a beautiful and productive milk crate garden that meets your needs and brings joy to your gardening experience.
Now that you have all the information you need, it’s time to get started on your own milk crate garden. Happy gardening!
Gardening in Milk Crates Frequently Asked Questions
Q1: Can I use any type of milk crate for gardening?
A1: Yes, you can use both plastic and wooden milk crates for gardening. However, plastic crates are generally preferred because they are lightweight, durable, and weather-resistant. Ensure that the crates are clean, sturdy, and have adequate drainage holes.
Q2: What types of plants grow best in milk crates?
A2: Many types of plants can thrive in milk crates, including vegetables like lettuce, spinach, and carrots; herbs such as basil, parsley, and mint; and flowers like marigolds, petunias, and pansies. Choose plants that do not require extensive root space and are suited to the conditions of your garden space.
Q3: How often should I water my plants in milk crates?
A3: The watering frequency depends on the type of plants, weather conditions, and soil mix. Generally, you should water when the top inch of soil feels dry. In hotter climates, daily watering may be necessary, while in cooler conditions, watering every few days might suffice. Always ensure the soil remains moist but not waterlogged.
Q4: How can I prevent pests and diseases in my milk crate garden?
A4: Regularly inspect your plants for signs of pests and diseases. Use natural remedies like neem oil or insecticidal soap to control pests. Ensure good air circulation by not overcrowding the crates, water at the base of the plants to prevent fungal diseases, and promptly remove any dead or diseased plant material. Crop rotation and choosing disease-resistant plant varieties can also help.
Q5: Can I grow a milk crate garden indoors?
A5: Yes, you can grow a milk crate garden indoors as long as the plants receive adequate sunlight. Place the crates near a window that gets plenty of sunlight or use grow lights to supplement natural light. Ensure proper drainage to avoid water damage to indoor surfaces and choose plants suited for indoor growing conditions.