Straw Bale Gardening: Cultivating Abundance in Compact Spaces
If you’ve ever dreamed of having your own bountiful garden but don’t have the luxury of ample outdoor space, straw bale gardening might just be the solution you’ve been waiting for. This innovative gardening technique allows you to grow a wide variety of plants, from vegetables to flowers, in compact spaces and without the need for traditional soil beds. In this article, we’ll delve into the fascinating world of straw bale gardening, exploring what it is, how to get started, and the numerous benefits it offers.
What is Straw Bale Gardening?
Definition and Background
Straw bale gardening is a gardening method that utilizes straw bales as the growing medium instead of traditional soil beds. It was first introduced by Joel Karsten in his book “Straw Bale Gardens” and has gained popularity among garden enthusiasts looking for a versatile and space-saving way to cultivate plants. This technique has gained a reputation for its simplicity and effectiveness, making it accessible to both seasoned gardeners and beginners.
Benefits of Straw Bale Gardening
So, what makes straw bale gardening so appealing? Let’s take a look at some of the key benefits:
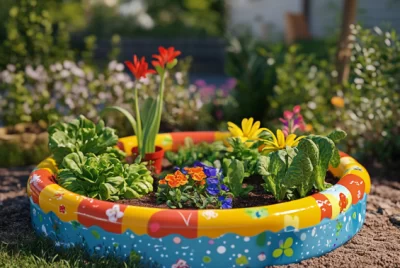
Space Efficiency
One of the most significant advantages of straw bale gardening is its ability to maximize space utilization. You can set up a straw bale garden virtually anywhere, be it a small urban balcony, a rooftop, or a modest backyard. This makes it an ideal solution for those with limited outdoor space who still want to enjoy the pleasures of gardening.
Soil Quality is Not an Issue
Straw bales provide an excellent growing medium, regardless of the quality of your existing soil. This means you can avoid the hassle of amending poor soil or dealing with soil-borne diseases and pests. It’s an excellent option if you’re unsure about the condition of your soil or if you’re gardening in an area with contaminated soil.
Reduced Weeding
Traditional gardening often involves a battle against weeds that can be time-consuming and frustrating. In contrast, straw bale gardening significantly reduces weed growth, thanks to the elevated planting surface and the absence of weed seeds in the straw bales themselves.
Better Drainage
Straw bales have excellent drainage properties, preventing overwatering and root rot. This ensures that your plants receive the right amount of moisture, promoting healthier growth and reducing the risk of waterlogged roots.
Accessibility
Straw bale gardening is more accessible to people with mobility issues or physical limitations. The elevated height of the bales makes it easier to plant, tend to, and harvest your crops without bending or kneeling for extended periods.
Now that we’ve explored the basics and benefits of straw bale gardening, let’s move on to the essential steps for getting started with this exciting gardening technique. Whether you’re an experienced gardener looking to try something new or a novice eager to cultivate your green thumb, the next section will guide you through the process of selecting and preparing your straw bales for a successful garden.
Getting Started with Straw Bale Gardening
Selecting the Right Straw Bales
Before you dive into the world of straw bale gardening, it’s crucial to choose the right straw bales for your project. Here are some considerations:
Condition of the Straw:
Ensure the straw bales you select are free from mold, mildew, or signs of rot. Healthy straw bales will have a golden-yellow color and a clean, fresh scent.
Straw Type:
Wheat straw is the most commonly used type for straw bale gardening due to its availability and suitability. Avoid hay bales, as they contain seeds that can lead to unwanted plant growth.
Size and Shape:
Standard-sized straw bales are approximately 14 inches wide, 18 inches high, and 36 inches long. You can find smaller bales as well. Choose the size that best fits your available space.
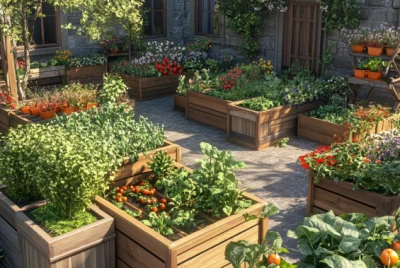
Preparing the Location
Once you’ve acquired your straw bales, it’s time to prepare the location for your garden. Here’s what you need to do:
Sunlight:
Select a spot that receives at least 6-8 hours of direct sunlight each day. Adequate sunlight is essential for the growth of most plants.
Laying the Bales:
Place your straw bales in the desired location with the cut sides facing up. This will create a flat planting surface. Ensure there’s enough space between the bales for you to move comfortably and tend to your garden.
Positioning:
Arrange the bales in rows or a configuration that suits your space and aesthetics. Leave pathways between the rows for easy access.
Now that you’ve prepared the location and positioned your straw bales, the next step is conditioning the bales for planting.
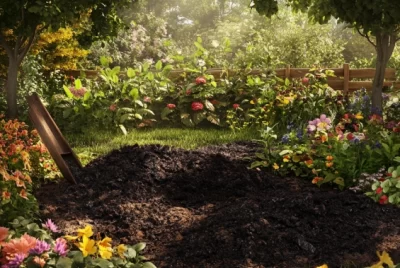
Conditioning the Straw Bales
Watering and Fertilization Process
The conditioning process is a crucial step in straw bale gardening. It involves breaking down the straw inside the bales to create a fertile environment for your plants. Follow these steps:
Day 1-6:
Water the bales thoroughly, ensuring they are completely soaked. You may need to water them daily during this period.
Day 7-12:
Begin adding a high-nitrogen fertilizer to the bales, following the manufacturer’s instructions. This will kick-start the decomposition process. Water the bales daily.
Day 13-18:
Continue with the fertilizer application and daily watering. You’ll notice the bales starting to heat up. This is a sign that decomposition is occurring.
Day 19-21:
By this point, the bales should be significantly warmer. Reduce the fertilizer application but continue to water daily.
Monitoring Temperature and Moisture
Throughout the conditioning process, it’s essential to monitor the temperature inside the straw bales. Use a long thermometer probe to check the internal temperature. The goal is to reach a temperature of around 100-120°F (37-49°C). This indicates that the straw is breaking down and becoming a suitable planting medium.
As the straw bales undergo this transformation, they’ll provide a warm and inviting environment for your plants, much like a traditional garden bed with rich, well-rotted compost.
With your straw bales properly conditioned and ready for planting, the next section will guide you through the process of selecting suitable plants and the techniques for planting them in your straw bale garden.
Planting in Straw Bales
Choosing Suitable Plants
Now that your straw bales are conditioned and ready, it’s time to select the plants you want to grow. The beauty of straw bale gardening is its versatility; you can cultivate a wide range of plants. Consider these options:
Vegetables:
Tomatoes, peppers, cucumbers, zucchini, and lettuce thrive in straw bales.
Herbs:
Basil, oregano, mint, and parsley do exceptionally well.
Flowers:
Marigolds, petunias, and nasturtiums can add a pop of color to your garden.
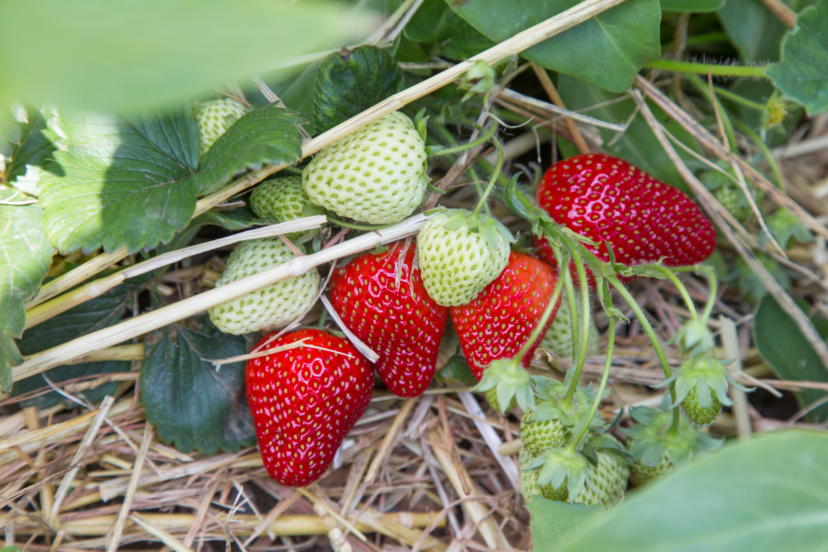
Fruit:
Strawberries can be grown in straw bales, allowing you to enjoy homegrown berries even in limited spaces.
Planting Techniques
Planting in straw bales is slightly different from traditional gardening. Here’s how to do it:
Create Planting Holes:
Use a trowel or your hand to create holes in the bales. Make the holes deep enough to accommodate the root system of your chosen plants.
Add Soil Mix:
Fill each planting hole with a mixture of potting soil and compost. This provides extra nutrients for your plants.
Planting:
Place your seedlings or seeds into the holes and gently firm the soil around them. Water thoroughly after planting.
Mulch:
Apply a layer of straw or mulch on top of the bales to help retain moisture and suppress weeds.
Maintenance and Care
Watering and Nutrient Management
Straw bale gardens require consistent watering. Check the moisture level regularly, and water when the top of the bales feels dry. Be mindful not to overwater, as this can lead to root rot.
As your plants grow, consider adding a balanced liquid fertilizer to ensure they receive essential nutrients. Follow the recommended dosage on the fertilizer label.
Pest and Disease Control
Straw bale gardens are less susceptible to certain soil-borne pests and diseases, but they are not immune. Keep an eye out for common garden pests like aphids and caterpillars. Use organic pest control methods when needed, such as neem oil or introducing beneficial insects like ladybugs.
Regularly inspect your plants for signs of disease, and promptly address any issues to prevent them from spreading.
Conclusion
Straw bale gardening offers a creative and space-efficient way to grow a lush garden in even the smallest of spaces. By selecting the right straw bales, conditioning them properly, and following the planting and maintenance techniques outlined in this article, you can enjoy a thriving garden without the need for traditional soil beds.
The benefits of straw bale gardening, including space efficiency, improved drainage, and reduced weeding, make it an attractive option for both experienced gardeners and beginners. Plus, the versatility of plants you can grow in straw bales allows you to tailor your garden to your preferences.
So, whether you’re a city dweller with a tiny balcony or someone looking to maximize their gardening space, give straw bale gardening a try. It’s a sustainable and accessible way to cultivate your green thumb and harvest the rewards of your efforts, no matter how limited your outdoor space may be. Happy gardening!
Frequently Asked Questions (FAQs) about Straw Bale Gardening
1. Is straw bale gardening suitable for all types of plants?
Yes, straw bale gardening is quite versatile and can accommodate a wide range of plants, including vegetables, herbs, flowers, and even some fruits. The key is to choose plants that are well-suited to your climate and the amount of sunlight your location receives.
2. How often should I water my straw bale garden?
The frequency of watering depends on factors like weather conditions and the size of your bales. Generally, you should check the moisture level daily and water when the top of the bales feels dry. Overwatering should be avoided, as it can lead to root rot.
3. Can I reuse straw bales for multiple growing seasons?
Yes, you can reuse straw bales for several growing seasons. After a season, remove any remaining plant roots, fluff up the straw, and add fresh compost or organic matter to revitalize the bales. This helps maintain the fertility of the straw and ensures successful subsequent crops.
4. Are there any common pests or diseases specific to straw bale gardening?
Straw bale gardens are generally less susceptible to soil-borne pests and diseases. However, you should still watch for common garden pests like aphids and caterpillars. Regularly inspect your plants for signs of disease and address any issues promptly to prevent their spread.
5. Can I create a straw bale garden on my apartment balcony or rooftop?
Absolutely! Straw bale gardening is an excellent option for small spaces like apartment balconies or rooftops. Just make sure your chosen location receives at least 6-8 hours of direct sunlight each day. You can set up straw bales in containers or directly on suitable surfaces to create your mini garden.